How to set up fields for the Basic Information step
At the Basic Information step, clients are prompted to provide their personal information by completing the fields displayed on the Sign Up page in the B2Core UI. You can set up the fields for this step.
To set up fields for the Basic Information step:
Navigate to System > Wizards.
Select the Registration wizard and click Edit.
Go to the Workflow tab.
Click the Edit button located in the Basic Information step row.
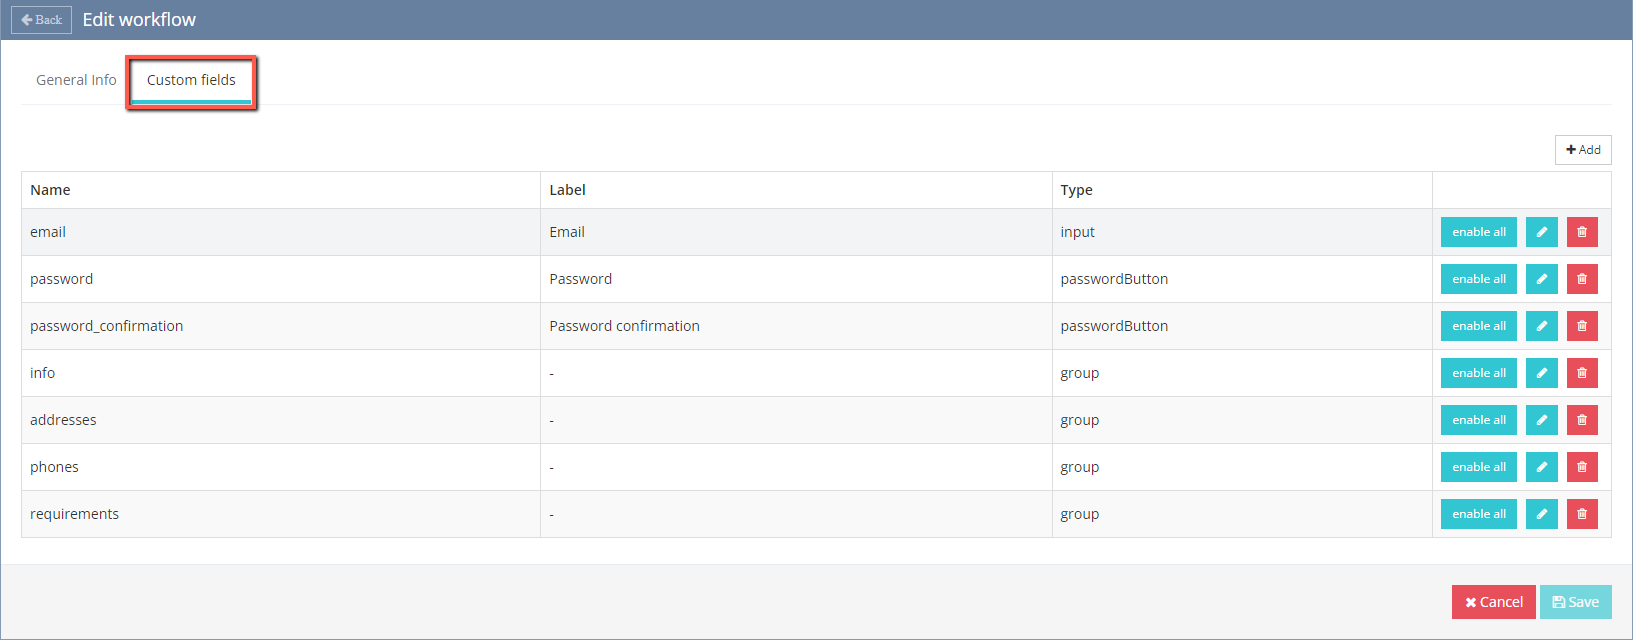
Go to the Custom fields tab.

To add a new field, click +Add.
To modify settings of an existing field, click the Edit button located in the field row.
Note
The Registration wizard can accept and process only a specific set of data.
For details on the fields that you can add, along with their names, settings, and attributes, refer to Fields supported in the Basic Information step.
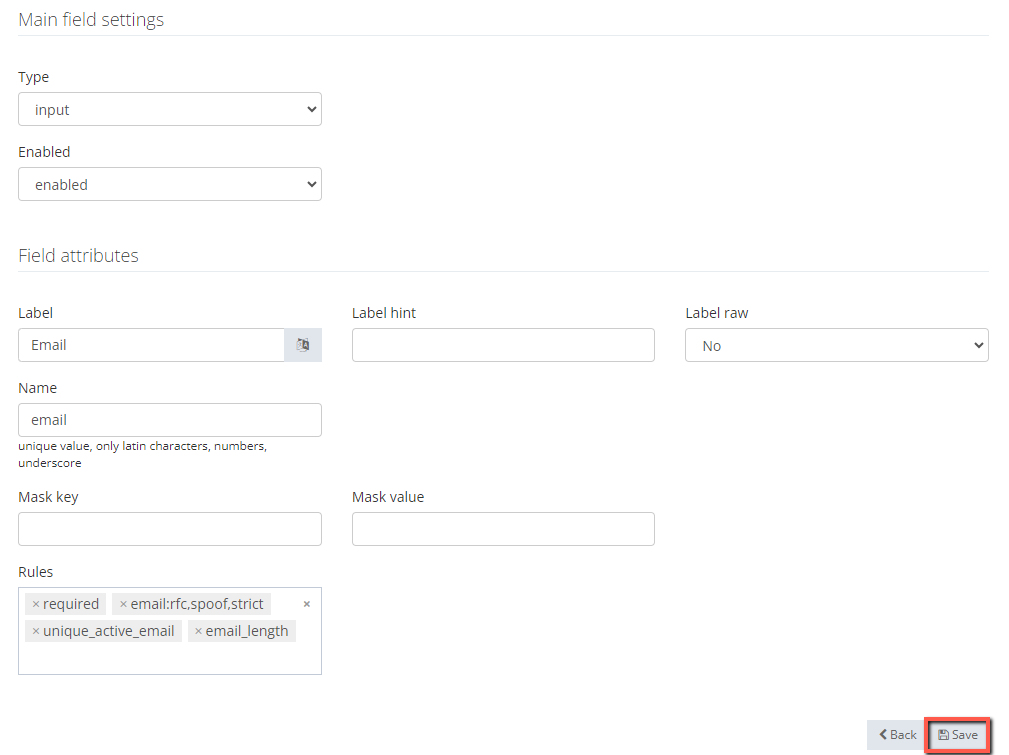
Configure the following field settings:
In the Main field settings section:
In the Type dropdown, select the field type.
In the Enabled dropdown, select
Enabledto display the field during registration orDisabledto hide the field.In the Field attributes section:
In the Name field, enter the field name used on the Back Office.
In the Label field, enter the field label. Field labels are displayed on the Sign Up page in the B2Core UI.
In the Rules dropdown, select one or more rules for validating the data entered in the field by clients.
The list of field attributes depends on the selected field type and can include other attributes. If additional attributes are available for the field, they are listed in Fields supported in the Basic Information step.
Click Save to apply the changes to the field settings.

After saving the field settings, you’ll be redirected to the fields list on the Custom fields tab.
On the tab, you can reorder the fields by dragging and dropping them in the required order.
On the Sign Up page in the B2Core UI, the fields will appear in the specified order.
Ensure that all the fields you want clients to complete during registration are enabled.
Click Save to apply the changes to the wizard.


