
Deploying your iOS app
We offer assistance with launching your branded iOS app, which is a valuable addition to your web solution, enhancing the experience for your clients.
To publish your app on the App Store, you need to consider a variety of policy issues to ensure strict compliance with all of the guidelines and regulations, which may be a non-trivial task.
In this document, you can find detailed instructions on how to properly prepare your iOS app to speed up its approval and successful publication on the App Store.
Note
All trademarks, logos and brand names referenced in this document are the property of their respective owners. All company, product and service names used in this document are for identification purposes only. The use of these names, trademarks and brands does not imply endorsement.
Step 1. Prepare the licenses for trading crypto
First of all, before proceeding with building and submitting your iOS app for review, you need to determine in which countries this app will be available and take special care to obtain all the licenses required to provide your services in these countries.
This procedure might be time-consuming, and you must obtain all the required licenses in advance to make sure that you are allowed to trade all the instruments that are configured in your B2Core solution, and then hand over these licenses to the App Store review team.
The license requirements are mandatory, and the permissions to servicing trading operations must be granted by Apple. To learn more about the licensing requirements which apply specifically to cryptocurrencies, refer to App Store Review Guidelines - 3.1.5 Cryptocurrencies.
Step 2. Create and configure a demo account in the B2Core UI
To be able to review all of your app’s functionality, the App Store review team needs access to a demo account. For this reason, you need to configure a demo account in the B2Core Back Office as follows:
Verify your demo account by going through all the steps of the account verification procedure. Contact your Account Manager for assistance with configuring the verification procedure in the B2Core Back Office.
In the Back Office, examine and enable all the B2Core UI modules that will be featured in your mobile app. Each module must be properly configured to ensure that your mobile app will not be rejected by the App Store during review.
If your app enables its users to transfer or exchange assets, you also need to make sure that there are enough funds on your demo account, so that the App Store review team is able to check the transfer and exchange functionality as well.
Step 3. Enroll in the Apple Developer Program as an Organization
To be able to open an Apple Developer account, you must provide the following information:
your D-U-N-S number
your Legal Entity Status
your Legal Binding Authority
your website address
To publish your iOS app, you need to enroll in the Apple Developer Program as an organization, and then share access to your developer account with the B2Core team by sending your access credentials to our company email: applemobile@b2broker.com.
Further on, with each iOS release, the B2Core team will upload a new app build for you, and you will be be responsible for managing the regular maintenance of the app (for details, refer to Step 8. Update your app with new releases).
For general information, refer to Before You Enroll — Apple Developer Program.
For step-by-step instructions, refer to Enrolling in the Apple Developer Program as an organization.
Step 4. Grant the access and admin permissions to the B2Core team
For the B2Core team to be able to configure your app at App Store Connect, you need to grant the following admin permissions to our team. To do this, proceed as follows:
At App Store Connect, switch to Users and Access.
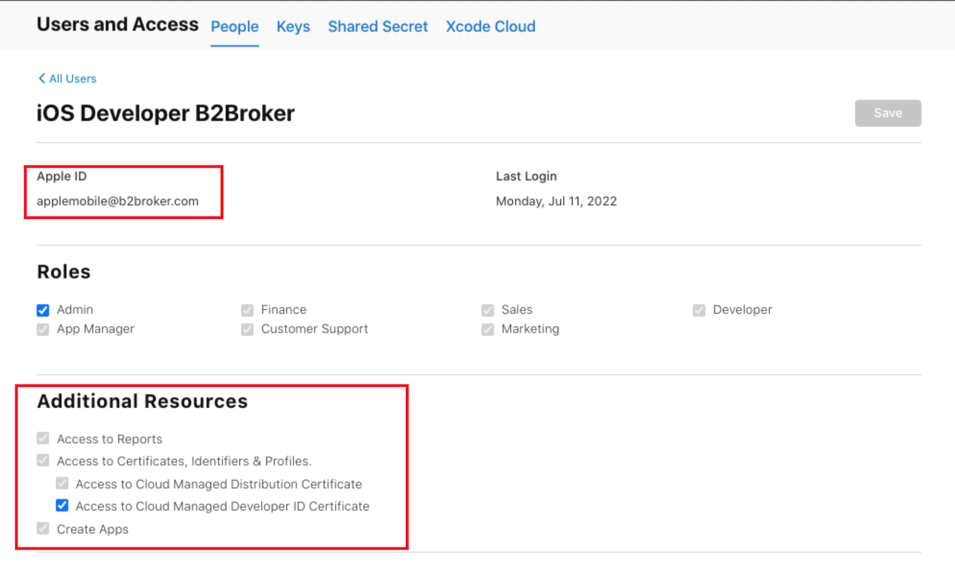
On the People tab, add a new person with the B2Broker company email (applemobile@b2broker.com).
In the Roles section, enable the Admin role.
In the Additional Resources section, make sure that all the permissions are enabled as follows:
Access to Reports
Access to Certificates, Identifiers & Profiles, which includes:
Access to Cloud Managed Distribution Certificate
Access to Cloud Managed Developer ID Certificate
Create Apps
Step 5. Provide all necessary information to your Account Manager
Contact your Account Manager at B2Broker to inform the development team that they must prepare your app for publishing.
You need to provide the following information to your Account Manager, which will be passed over to the development team:
The information about licenses, along with the credentials to your B2Core Demo Account.
The URL of your B2Core UI instance.
The legal name of your company, as well as your Apple Developer Account name (typically, it coincides with the company name specified when creating a Developer Account as an Organization).
The email of the Developer Account’s owner.
In addition, you need to provide the following information:
The name of your iOS app (it must not exceed 16 characters).
The primary language of the app (English is set by default) and a list of supported languages for localization purposes.
Your preferences regarding the app icon (such as the required color scheme).
Your preferences regarding the app screenshots displayed on the product page on the App Store.
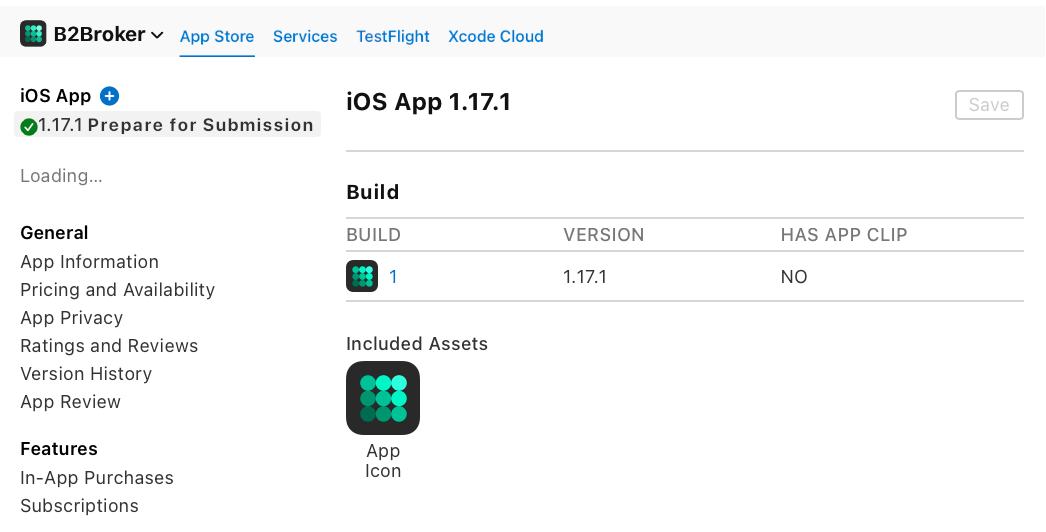
After your Account Manager contacts the B2Core development team, they prepare your app and upload the build to the App Store. The app then appears at the App Store Connect, with its version indicated and its status set to Prepare for Submission.
Step 6. Specify the pricing, availability and privacy options
At App Store Connect, configure the following app settings:
Pricing and Availability
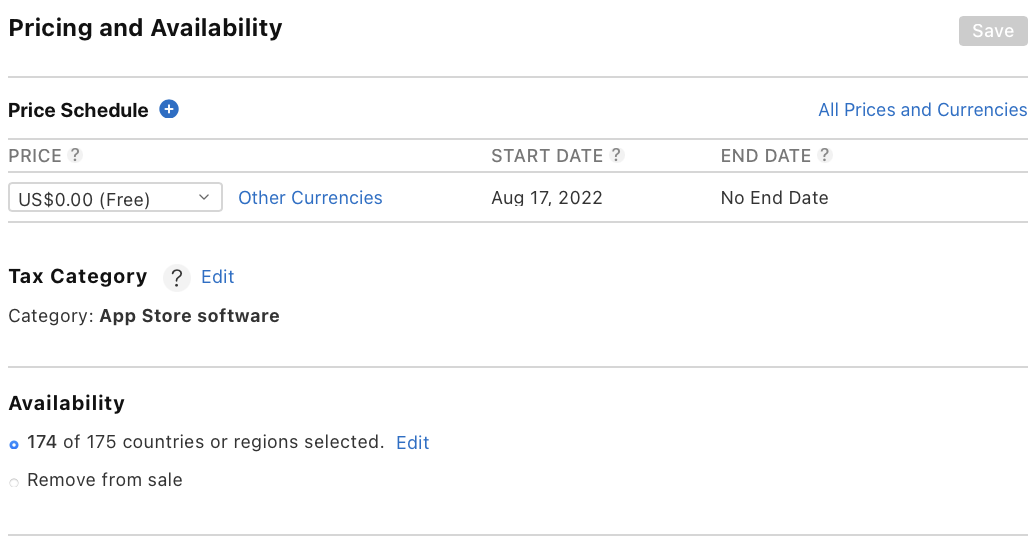
In this section, you need to specify the following options:
We recommend that you offer your mobile app for free and set the Price Schedule field to
US$0.00 (Free).Set the Tax Category field to
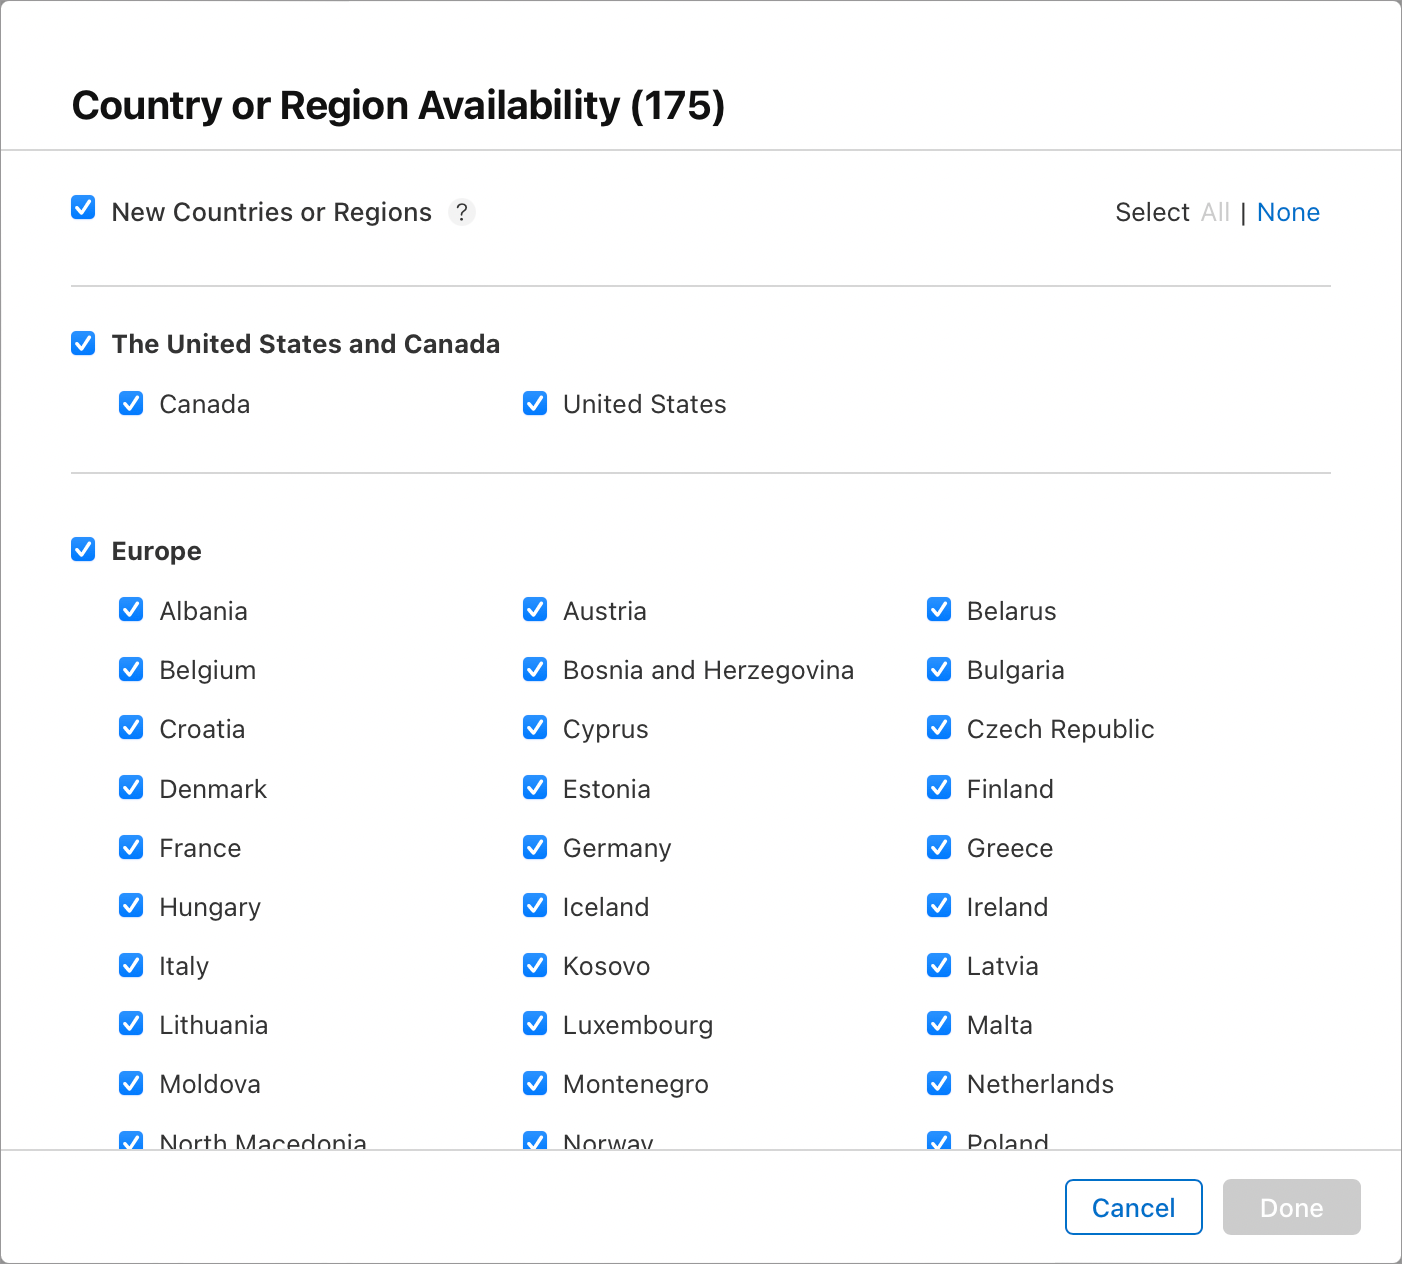
App Store software.In the Availability section, select the countries in which your app will be available, according to the licenses obtained by you.
For the other options in this section, you can leave the default settings.
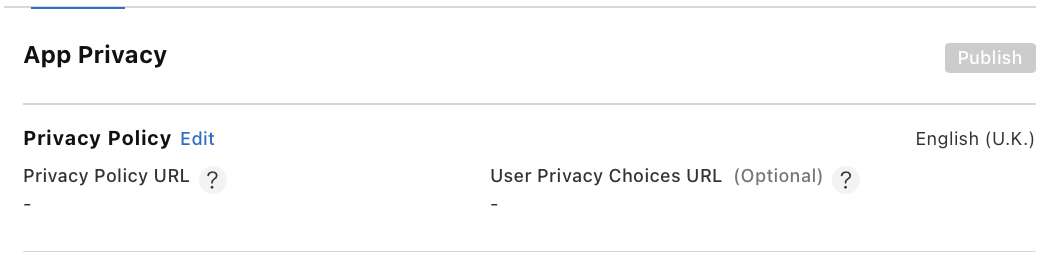
App Privacy
In this section, specify the Privacy Policy URL, which must be the same one that you specified for your B2Core UI instance.
Next, click Get Started and complete the quiz to specify your app’s data collection policy:
Contact Info
Your app will collect the user’s email address by default.
Depending on your app’s configuration, it may also collect other data, such as the username, phone number, user address and other contact information. Please make sure that you indicate the collected data according to the options that are specified in your B2Core Back Office.
Identifiers
The User ID data is collected by default.
The Device ID data is not collected.
User Content
The user photos and videos are collected.
Other User Content
On this page, select
App FunctionalityandOther Purposes.
The following example illustrates the data collection settings that must be specified by a client publishing a standard iOS app:
Data Linked to You:
Contact Info
User Content
Identifiers
Data Not Linked to You:
Diagnostics
Contact Info:
Name
Used for Other PurposesandApp FunctionalityLinked to the user's identity
Email Address
Used for Other PurposesandApp FunctionalityLinked to the user's identity
Phone Number
Used for Other PurposesandApp FunctionalityLinked to the user's identity
Physical Address
Used for Other PurposesandApp FunctionalityLinked to the user's identity
Other User Contact info
Used for Other PurposesandApp FunctionalityLinked to the user's identity
User Content:
Photos or Videos
Used for Other PurposesandApp FunctionalityLinked to the user's identity
Other User Content
Used for Other PurposesandApp FunctionalityLinked to the user's identity
Identifiers:
User ID
Used for Other PurposesandApp FunctionalityLinked to the user's identity
Diagnostics:
Crash Data
App Functionality
To learn more, refer to App privacy details on the App Store.
Step 7. Specify a demo account from which the Apple Review team will log in
Once your app is uploaded to App Store Connect, you need to specify a demo account that you have created at Step 2. The App Store review team will use this account to log in and review your app.
To specify a demo account, proceed as follows:
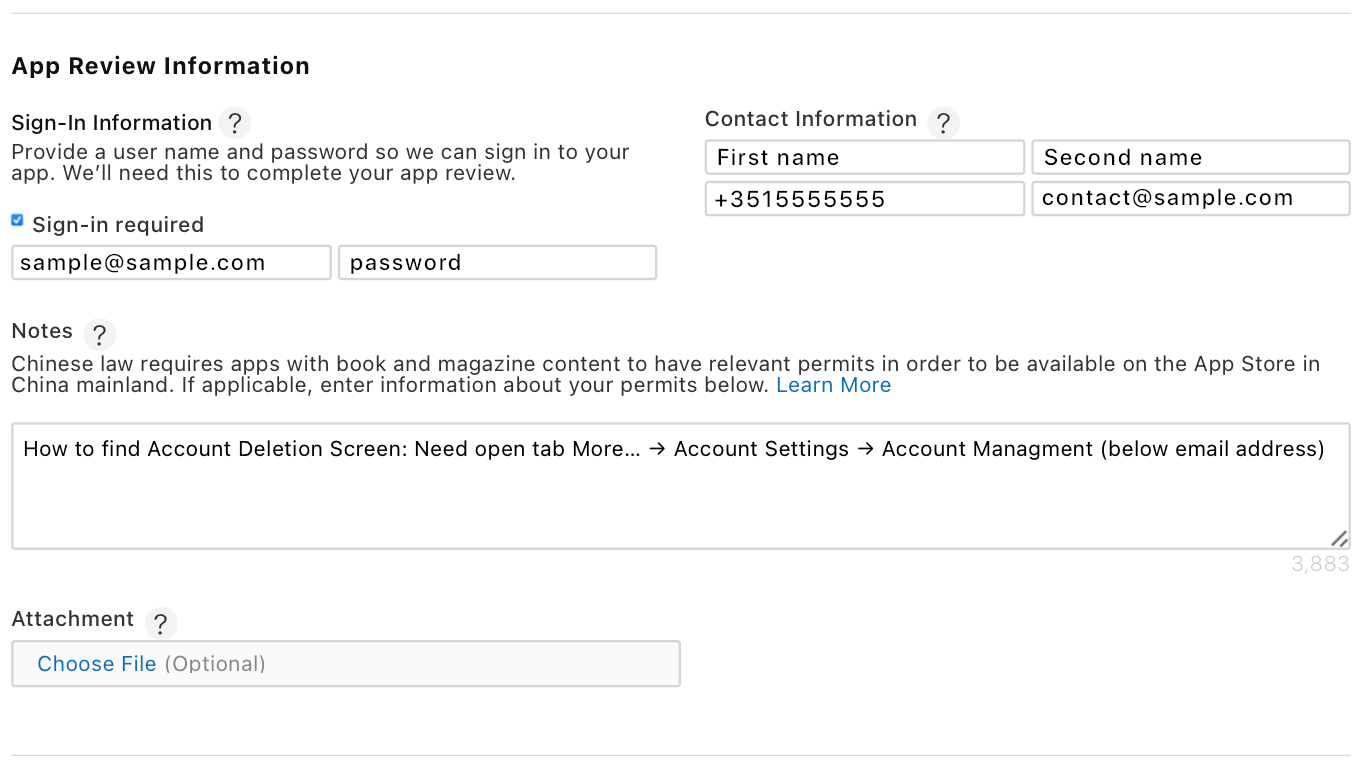
At App Store Connect, switch to App Review > Prepare for Submission.
In the App Review Information section, enable the Sign-in Required checkbox, and then specify the login and password for your demo account.
In the Contact Information section, specify the contact information of a person responsible for configuring App Store Connect.
The App Store review team will contact this person to inform them whether the app is accepted or rejected, or whether any additional information is needed.
In the Notes field, add the links to your licenses and attach their scans (if available).
The licenses must be provided for each country that you selected in the Availability section at Step 6. The links must be added below the information on how to locate the delete account button.
In the Notes field, add the following text:
The app doesn't rely on any third-party API, including any API that might put our users' data at risk. The app uses only a custom REST API to communicate with the backend with the purpose of providing financial services. This API is developed and owned by our company. Therefore, we guarantee correct functioning of the API.
Specify the following fields:
Promotional Text
Description
What’s New in This Version
Keywords
Support URL
Marketing URL
Version
Copyright
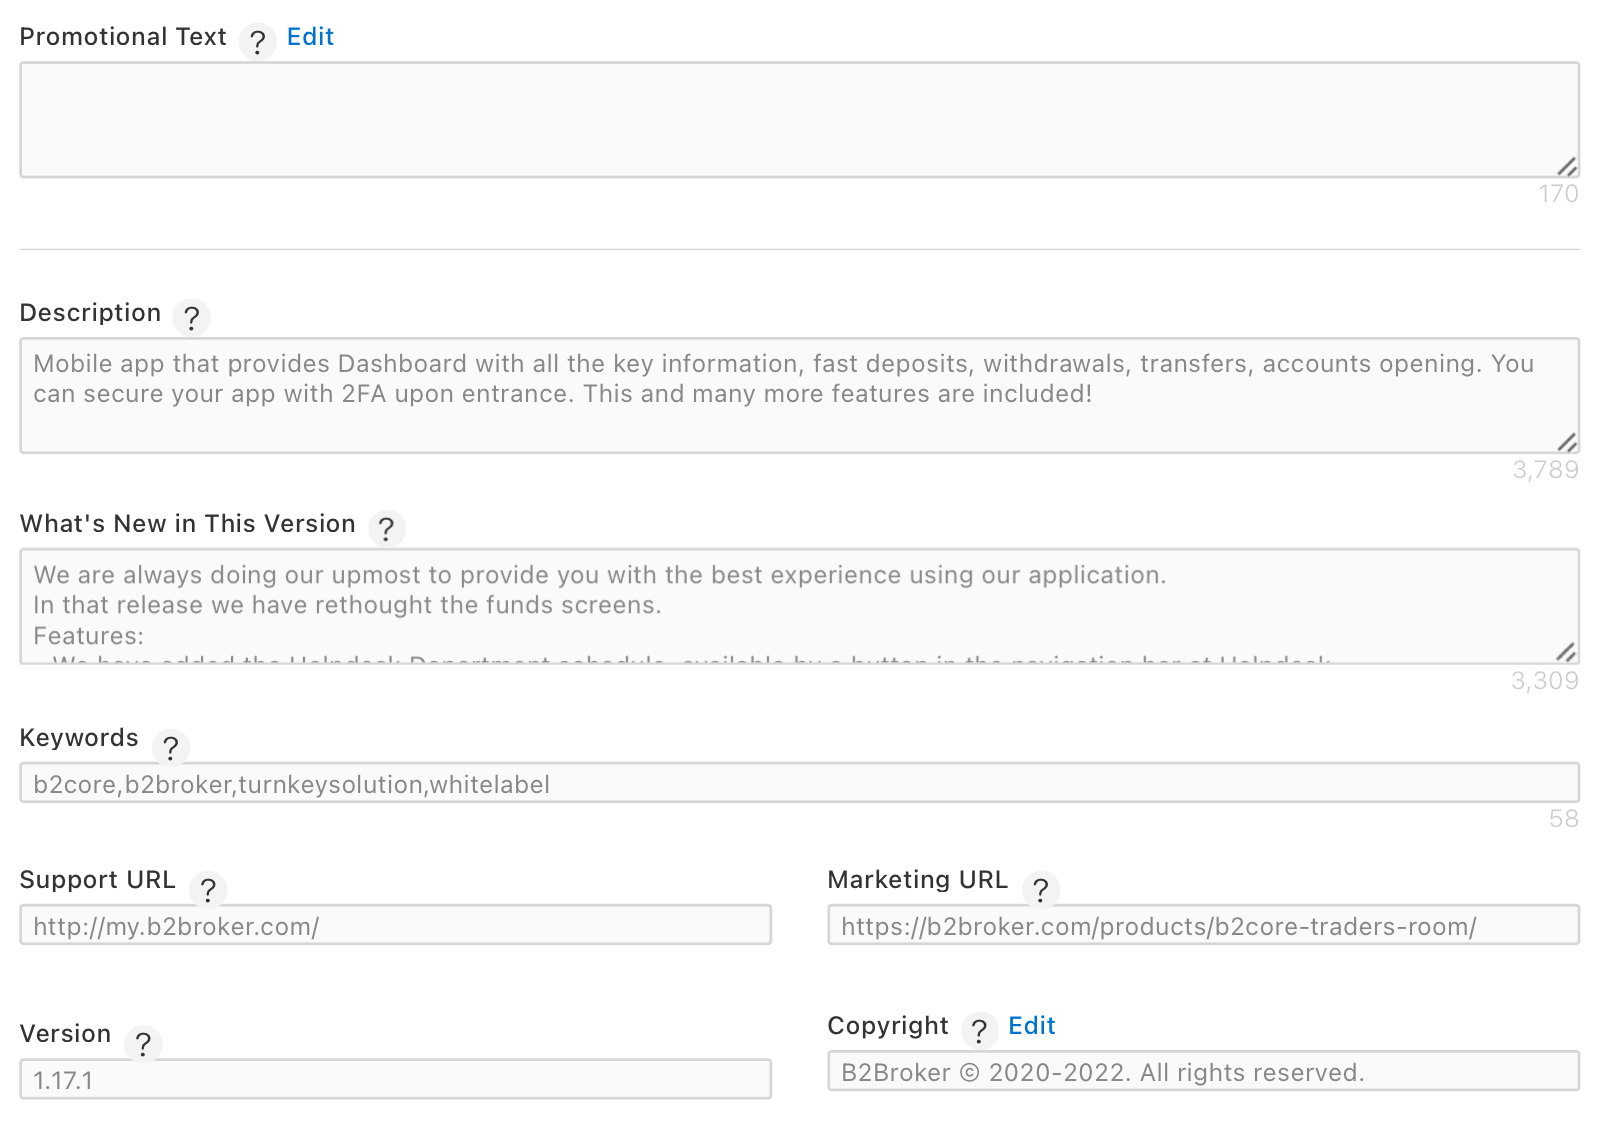
To learn more about these fields, refer to Platform version information.
Click Add for Review to submit your app for review to the App Store team.
When your app is reviewed and approved, its status will be changed to Ready for Distribution.
Step 8. Update your app with new releases
With each iOS release, the B2Core team will upload a new app build for you in App Store Connect.
You need to create a new app version, add the new build to the version, and submit it for review to the App Store team.
Create a new app version
When the B2Core team notifies you of a new iOS release, create a new app version in Apple Store Connect, add a new build to it, and submit it for review to the App Store team.
Note
You can create a new version only if the current app version has the Ready for Distribution status.
If for some reasons, your current app version wasn’t submitted for review and has an editable status, update the current version with a new build instead of creating a new version.
For a full list of possible statuses, refer to App and submission statuses.
From Apps, select your app.
On the Distribution tab, click the add button (+) displayed in the iOS App section of the sidebar.
In the New Version popup, the new version number (for example,
1.24.0) and click Create.You can view a complete list of app versions and builds uploaded for them on the TestFlight tab.
Review the new version metadata.
When you create a new version, the metadata from the current version is transferred to the new version automatically. For a description of the version properties, refer to Platform version information.
Click Save in the upper-right page corner.
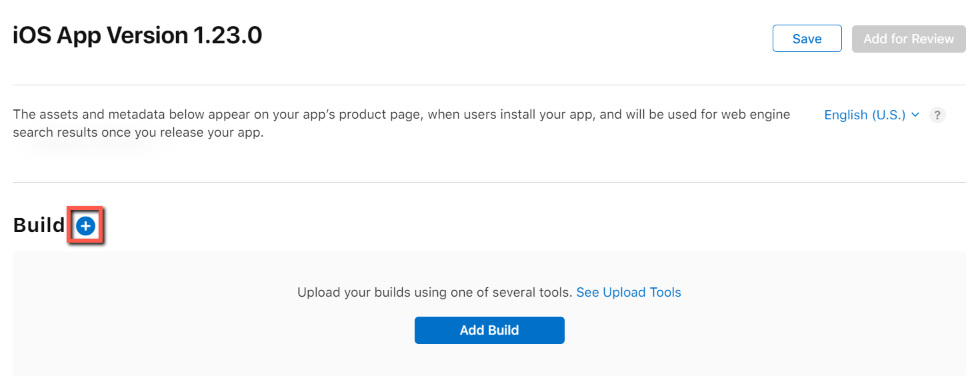
Add the latest app build to the newly created version:
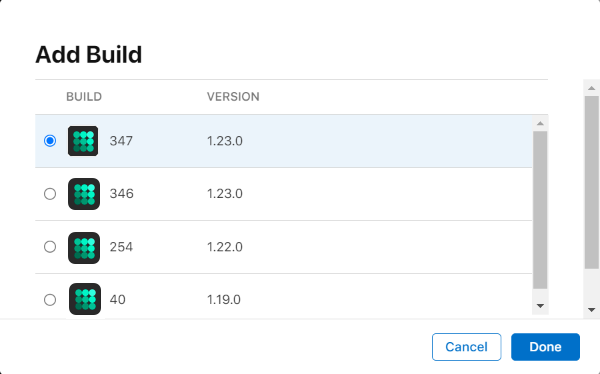
Scroll down to the Build section, and then click the add button (+) displayed next to the section.
In the Add Build popup, select the build with the highest version number and click Done.
Add the release notes to the What’s new in this version field. The RNs for each iOS release, can be found here.
Note
The RNs may not be fully applicable to your app, so you may need to edit them to include only the updates relevant to your app’s functionality. For example, if the RNs mention updates for a trading platform that your app doesn’t support, omit that item from the What’s new in this version field.
Click Save in the upper-right page corner.
Click Add for Review to submit the new app version for review to the App Store team.
When your new app version is reviewed and approved, its status will be changed to Ready for Distribution.
Update the current app version with a new build
If your current app version doesn’t have the Ready for Distribution status in App Store Connect, you can’t create a new app version when a new iOS release is available.
Instead, select a new build for the current version and submit it for review to the App Store team.
From Apps, select your app.
In the sidebar, select the app version for which you want to upload a new build.
Note
You can do it only for the version that has one of the editable status.
For a full list of possible statuses, refer to App and submission statuses.
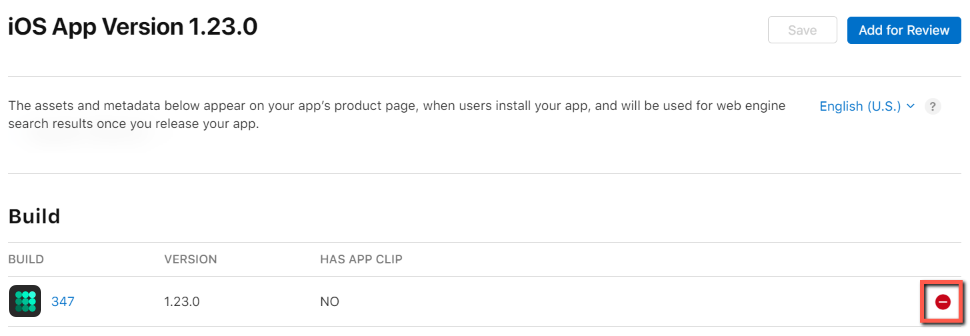
Scroll down to the Build section.
To remove the previous build, hover over the build and click the delete button (-) that appears on the right side of the build row.
Add the latest build:
Click the add button (+) displayed next to the Build section.
In the Add Build popup, select the build with the highest version number and click Done.
In the Version field, update the version number to match the new iOS release. For example, change
1.23.0to1.24.0.Add the release notes to the What’s new in this version field. The RNs for each iOS release, can be found here.
Note
The RNs may not be fully applicable to your app, so you may need to edit them to include only the updates relevant to your app’s functionality. For example, if the RNs mention updates for a trading platform that your app doesn’t support, omit that item from the What’s new in this version field.
Click Save in the upper-right page corner.
Click Add for Review to submit the new app version for review to the App Store team.
When your new app version is reviewed and approved, its status will be changed to Ready for Distribution.